Introduction to Creamy Chocolate Ice Cream Bars (Homemade)
My grandfather always kept a stash of frozen treats hidden behind the frozen peas.
Nothing beat that satisfying snap of cold chocolate on a humid Tuesday afternoon.
Now, I make these Creamy Chocolate Ice Cream Bars (Homemade) to recreate that magic.
Life gets hectic between work deadlines and keeping the house from falling apart.
You deserve a simple win that tastes like a gourmet shop specialty.
This recipe is my secret weapon for impressing the family without any stress.
It turns basic pantry staples into a velvety, rich masterpiece everyone will love.
Grab a whisk, because we are elevating your dessert game right now.
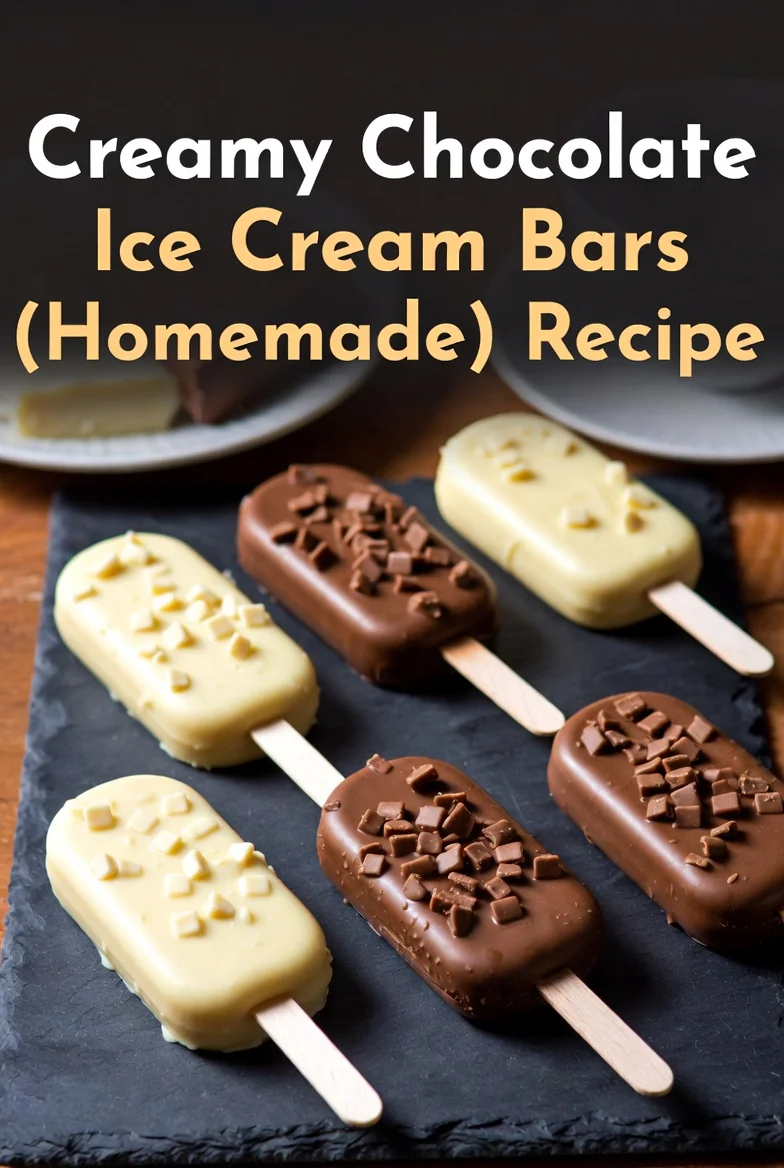
Creamy Chocolate Ice Cream Bars (Homemade) Recipe
Why You’ll Love This Creamy Chocolate Ice Cream Bars (Homemade)
You don't need a fancy, expensive machine to achieve that professional, silky mouthfeel.
This recipe is incredibly forgiving, even if you’re juggling a million other tasks.
I love how it balances intense cocoa notes with a cooling, decadent finish.
It is much cheaper than buying artisanal boxes at the local high-end grocery.
Plus, you control the sugar, making it a smarter win for your family.
The Creamy Chocolate Ice Cream Bars (Homemade) provide pure, nostalgic bliss in every bite.
Ingredients for Creamy Chocolate Ice Cream Bars (Homemade)
I remember standing in the baking aisle, staring at twenty different types of cocoa.
It turns out, the best results come from simple, high-quality ingredients you likely own.
Heavy cream serves as our velvety foundation, providing that luxurious, fat-rich mouthfeel we crave.
Whole milk thins the base just enough to keep it refreshing rather than heavy.
Granulated sugar dissolves quickly into the liquids to ensure every single bite is sweet.
Unsweetened cocoa powder brings the deep, dark soul to these Creamy Chocolate Ice Cream Bars (Homemade).
I always add a splash of vanilla extract to bridge all these rich flavors.
Semi-sweet chocolate chips provide little bursts of texture that surprise your teeth while eating.
A pinch of salt might seem odd, but it actually makes the chocolate pop.
You can toss in some chopped nuts if you want a rugged, salty crunch.
Check the recipe card at the bottom for the exact measurements and printing options.
How to Make Creamy Chocolate Ice Cream Bars (Homemade)
Watching a liquid transform into a solid, frozen delight feels like a small kitchen miracle.
I usually clear some counter space and get my favorite heavy whisk ready for action.
The process is straightforward, but focusing on the texture makes all the difference for success.
Whisking the Liquid Base for Smoothness
Start by grabbing a large mixing bowl to prevent any messy cocoa powder splashes.
Pour in your heavy cream, whole milk, granulated sugar, cocoa powder, and the salt.
Whisk these ingredients vigorously for about three minutes until the sugar feels completely dissolved.
You want a uniform, dark liquid without any stubborn lumps of dry cocoa floating around.
This step ensures your Creamy Chocolate Ice Cream Bars (Homemade) have a consistent, silky finish.
Incorporating Flavor and Texture Add-ins
Once your base is smooth, gently stir in the vanilla extract to round out the profile.
Now comes the fun part where we add the semi-sweet chocolate chips for some bite.
If you enjoy a bit of a "Rocky Road" vibe, toss in those chopped nuts now.
Folding them in by hand ensures they distribute evenly throughout the entire chocolate mixture.
I find that adding these bits makes the Homemade Ice Cream feel much more premium.
Preparing the Mold and Freezing Process
Grab a 9x13-inch baking dish or a flexible silicone mold for easy removal later.
Pour the chocolate mixture into the container, using a spatula to level the top surface.
Cover the dish tightly with plastic wrap to shield it from any unwanted freezer smells.
Slide it into the freezer for at least six hours, though overnight is always better.
Patience is key here to ensure the bars set firmly enough to hold their shape.
Slicing and Serving Your Frozen Treats
Pull the dish out and let it sit on the counter for five minutes.
This short rest makes slicing through the frozen block much easier on your wrists.
Use a sharp knife to cut the slab into twelve even, rectangular Chocolate Dessert portions.
If you aren't eating them all at once, wrap individual bars in some parchment paper.
This keeps them fresh and ready for a quick grab-and-go snack whenever cravings hit.
Tips for Success
Even the best recipes benefit from those little tricks I’ve learned through messy trial and error.
Follow these quick pointers to ensure your frozen treats come out perfect every single time.
- Sift the cocoa powder first to avoid annoying clumps in your smooth liquid base.
- Use high-quality vanilla extract because it truly elevates the deep, dark chocolate notes.
- Dip your knife in hot water before slicing to get those clean, professional edges.
- Press plastic wrap directly onto the surface to keep pesky ice crystals from forming.
Essential Tools for the Professional Kitchen
You don't need a high-tech lab to master these frozen treats at home.
I rely on these simple basics to get the job done without any extra clutter.
- Large mixing bowl: A glass or stainless steel bowl works best for whisking.
- Balloon whisk: This ensures your cocoa powder blends perfectly with the heavy cream.
- 9x13-inch baking dish: Use a silicone mold for even easier bar removal.
- Sharp chef’s knife: Essential for slicing through the frozen slab with total precision.
- Parchment paper: This prevents sticking and makes cleanup a total breeze for you.
Flavor and Dietary Variations
I love experimenting with these because my friends always have different dietary needs.
One week I’m making a vegan batch, and the next, I’m adding spicy kicks.
Here are a few ways to switch up your Creamy Chocolate Ice Cream Bars (Homemade):
- Swap the whole milk and cream for full-fat coconut milk for a dairy-free version.
- Add a half-teaspoon of peppermint extract to create a refreshing chocolate mint treat.
- Stir in a swirl of creamy peanut butter before freezing for a salty-sweet combo.
- Dust a pinch of cayenne pepper into the cocoa for a bold, Mexican-style heat.
- Replace granulated sugar with monk fruit sweetener to reduce the overall glycemic load.
- Mix in crushed pretzels instead of nuts to get a satisfying, crunchy salt hit.
- Fold in some espresso powder to deepen the chocolate and give yourself a buzz.
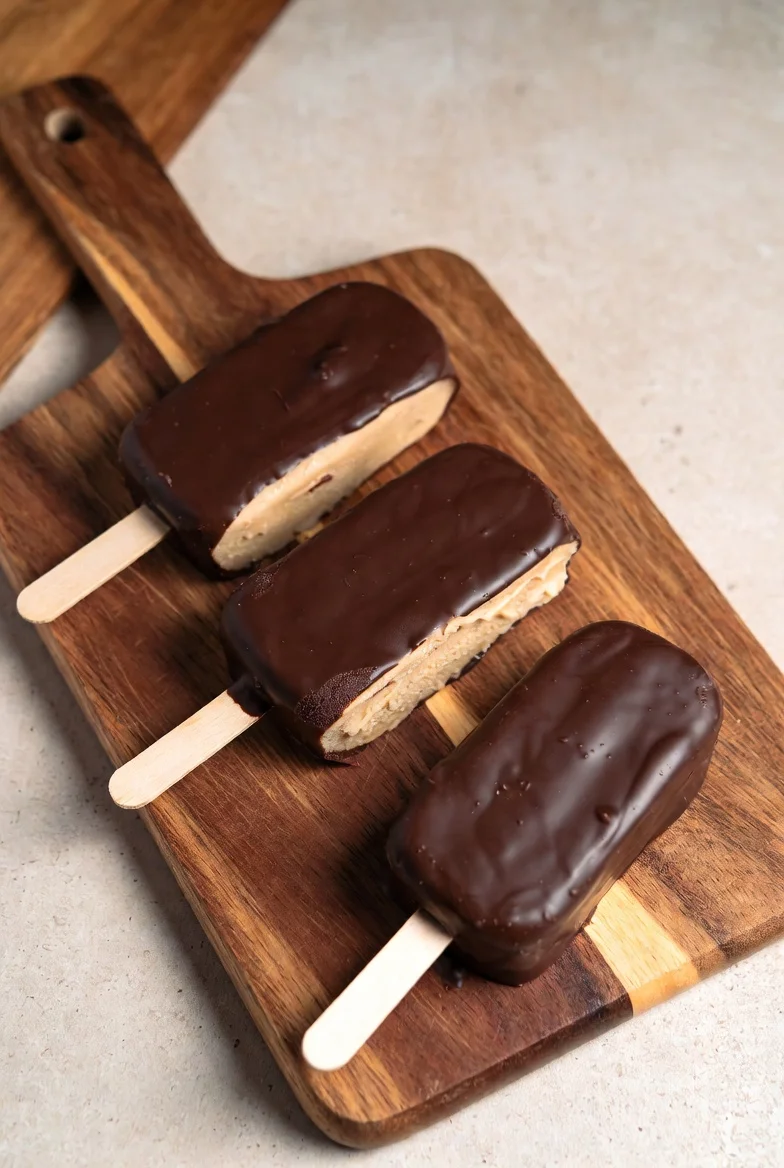
Creamy Chocolate Ice Cream Bars (Homemade) Recipe
Serving Suggestions
Presentation can turn a simple snack into a real backyard event for your buddies.
I like to keep things casual yet impressive when pulling these out of the freezer.
- Drizzle extra melted dark chocolate over the bars for a double dose of decadence.
- Serve alongside a glass of cold bourbon or a stout for a mature pairing.
- Roll the edges in toasted coconut or extra sea salt to add visual flair.
- Place bars on a chilled platter to keep them from melting during summer hangouts.
FAQs about Creamy Chocolate Ice Cream Bars (Homemade)
My kids always ask these questions while they’re hovering near the freezer door.
I’ve learned the hard way that knowing these details keeps the dessert quality high.
It saves you from wasting ingredients and ensures every Chocolate Dessert is perfect.
How long do these bars stay fresh in the freezer?
These Creamy Chocolate Ice Cream Bars (Homemade) usually last about two to three weeks.
I recommend wrapping them tightly in parchment paper and then using a freezer bag.
This double layer protects the delicate fats in the cream from absorbing odd smells.
If you leave them longer, the texture might become a bit too icy.
Eat them sooner for that peak velvety experience we all love so much.
Can I make this recipe dairy-free?
You can absolutely skip the cow’s milk and still enjoy these Frozen Treats.
I suggest using full-fat canned coconut milk as a direct substitute for the cream.
The high fat content is crucial for keeping that signature Homemade Ice Cream richness.
Almond milk works for the thin milk portion, though it may be slightly icier.
Just ensure you whisk it well to keep the cocoa emulsified and smooth.
What is the best way to prevent ice crystals?
Ice crystals are the enemy of a smooth Creamy Chocolate Ice Cream Bars (Homemade) batch.
The trick is to minimize the amount of air hitting the mixture during freezing.
Press a piece of plastic wrap directly onto the surface of the liquid base.
This creates a physical barrier that stops moisture from turning into crunchy ice shards.
Using full-fat ingredients also helps, as fat doesn't freeze into hard crystals like water.
Final Thoughts
There is something deeply satisfying about pulling a tray of Creamy Chocolate Ice Cream Bars (Homemade) out of your own freezer.
It reminds me that we don't always need to rely on store-bought boxes to find a moment of pure indulgence.
Sharing these Frozen Treats with friends on a hot afternoon creates the kind of simple memories that actually stick.
You’ve taken basic ingredients and transformed them into a Chocolate Dessert that rivals any high-end creamery in town.
I hope these velvety bars bring a bit of well-deserved sweetness to your busy week and impress your crew.
Keep experimenting with those flavors, stay hungry, and enjoy every single rich, chocolatey bite you’ve mastered today.
PrintCreamy Chocolate Ice Cream Bars (Homemade) Recipe
Indulge in these rich and velvety homemade chocolate ice cream bars. Made with heavy cream, cocoa powder, and chocolate chips, they offer a perfect balance of creamy texture and intense chocolate flavor with an optional nutty crunch.
- Prep Time: 15 minutes
- Cook Time: 0 minutes
- Total Time: 6 hours 15 minutes
- Yield: 12 bars 1x
- Category: Dessert
- Method: No-Churn / Freezing
- Cuisine: American
- Diet: Gluten Free
Ingredients
- 2 cups heavy cream
- 1 cup whole milk
- ¾ cup granulated sugar
- ½ cup unsweetened cocoa powder
- 1 teaspoon vanilla extract
- ½ cup semi-sweet chocolate chips
- ¼ cup chopped nuts (optional)
- ¼ teaspoon salt
Instructions
- In a large mixing bowl, whisk together the heavy cream, whole milk, granulated sugar, cocoa powder, and salt until smooth and the sugar is fully dissolved (about 2-3 minutes).
- Stir in the vanilla extract and semi-sweet chocolate chips. Add chopped nuts if desired for extra texture.
- Pour the mixture into a 9x13-inch baking dish or silicone mold, spreading evenly with a spatula.
- Cover tightly with plastic wrap or a lid and freeze for 4-6 hours, or ideally overnight, until firm.
- Remove from the freezer and let sit at room temperature for 5-10 minutes to soften slightly.
- Use a sharp knife to cut the mixture into bars. Serve immediately or wrap individually in parchment paper for storage.
Notes
- Ensure there are no lumps in the cocoa powder before freezing for the smoothest texture.
- If using a metal baking dish, lining it with parchment paper can make removing the bars easier.
- Store in an airtight container in the freezer to prevent ice crystals from forming.
Nutrition
- Serving Size: 1 bar
- Calories: 285
- Sugar: 22g
- Sodium: 65mg
- Fat: 21g
- Saturated Fat: 13g
- Unsaturated Fat: 7g
- Trans Fat: 0g
- Carbohydrates: 25g
- Fiber: 2g
- Protein: 3g
- Cholesterol: 55mg
Keywords: Creamy Chocolate Ice Cream Bars, Homemade Ice Cream, Chocolate Dessert, Frozen Treats