Introduction to Cassava Cake
My first bite of a real Cassava Cake happened in a tiny, humid kitchen.
An old friend's mother insisted I try a square while it was still steaming.
The texture was unlike anything I had ever tasted in my life.
It was dense, incredibly chewy, and carried a deep, comforting sweetness.
As guys with busy careers, we often settle for store-bought snacks.
However, this classic Filipino dessert is a total game-changer for your repertoire.
It offers a rich, tropical escape without requiring a culinary degree.
You can easily whip this up to impress guests at dinner.
It serves as a reliable, foolproof win for any hectic weeknight.
This treat brings a bit of soulful warmth to your busy kitchen.
Why You’ll Love This Cassava Cake
Most of us don't have hours to spend fussing over a stove.
This Cassava Cake is a massive win because it requires zero technical skill.
You simply mix the ingredients and let the oven do the heavy lifting.
It delivers a decadent, professional result that looks like you spent all afternoon baking.
The creamy texture and golden top make it a guaranteed crowd-pleaser for any occasion.
It’s the ultimate low-effort, high-reward dessert for your busy lifestyle.
Ingredients for Cassava Cake
Walking through the international aisle of my local market always feels like a treasure hunt.
I remember the first time I hunted for the star of this Cassava Cake recipe.
Finding the right components is half the fun, and luckily, most are pantry staples.
The base starts with grated cassava, which provides that signature, addictive chewiness we love.
You can find this root fresh, but frozen bags are a massive time-saver for us.
Next, we bring in the tropical heavy hitters to create that lush, velvety mouthfeel.
Coconut milk adds a rich, nutty depth that pairs perfectly with the starch.
Sweetened condensed milk follows, acting as the primary sweetener and creating a silky texture.
Granulated sugar provides an extra punch of sweetness to balance the earthy root flavors.
Melted unsalted butter ensures every single bite feels indulgent and stays incredibly moist.
Large eggs act as the glue, holding this beautiful, dense masterpiece together as it bakes.
A splash of vanilla extract adds a familiar, aromatic warmth that rounds out the profile.
Baking powder gives the cake a slight lift so it doesn't feel too heavy.
A pinch of salt is crucial to brighten the sugars and enhance the coconut notes.
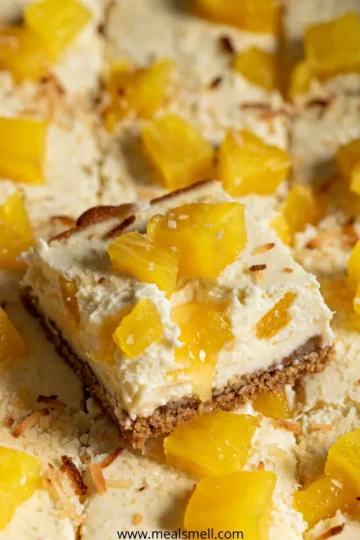
For those who like a bit of texture, shredded coconut makes a fantastic optional topping.
It toasts up beautifully in the oven, adding a lovely crunch to the creamy base.
Check the recipe card below for the exact measurements and a printable version for your kitchen.
| Ingredient | Purpose in the Recipe |
|---|---|
| Grated Cassava | The hearty, gluten-free base that creates a unique chewy texture. |
| Coconut Milk | Provides a creamy consistency and a subtle tropical aroma. |
| Condensed Milk | Sweetens the cake while adding a rich, milky depth. |
| Unsalted Butter | Adds fat for a tender crumb and a boost of flavor. |
| Vanilla & Salt | Essential flavor enhancers that balance the sweetness. |
How to Make Cassava Cake
The smell of caramelized coconut sugar always takes me back to summer barbecues.
I learned that the secret to a great Cassava Cake is all in the prep.
You don't need fancy gadgets to master this legendary Filipino dessert.
Just follow these simple steps to ensure a perfect, creamy result every time.
Preparing the Oven and Baking Dish
Start by preheating your oven to 350°F so it reaches the right heat.
Consistency is key when you want that perfect, even bake across the pan.
Grab a 9x13-inch baking dish and grease it well with butter or oil.
I often use parchment paper to make lifting the cake out much easier later.
Mixing the Cassava Cake Batter
Grab your largest mixing bowl and toss in the grated cassava first.
If you used frozen cassava, make sure you squeezed out the extra liquid.
Pour in the coconut milk, condensed milk, and that glorious melted butter.
Crack the eggs in and add a splash of vanilla for that amazing scent.
Whisk the mixture vigorously until the batter looks smooth and well-incorporated.
You want every ingredient to shake hands before they head into the heat.
Combining Dry and Wet Ingredients
Now, gently stir in the baking powder and a pinch of salt.
These small additions make a massive difference in the final flavor profile.
Mix until just combined to keep the texture from becoming too tough.
Pour the thick batter into your prepared dish and smooth the top out.
If you like a little extra flair, sprinkle shredded coconut over the surface now.
This creates a beautiful, rustic look once the heat hits the natural oils.
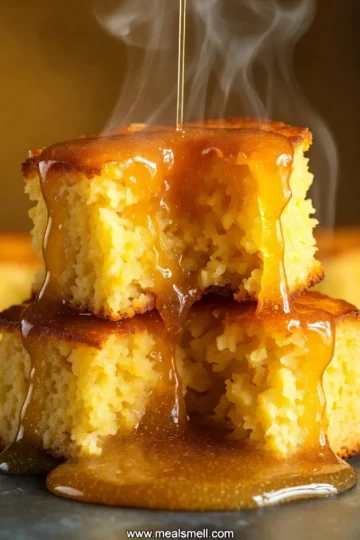
Baking to Golden Perfection
Slide the dish onto the center rack and set your timer for 45 minutes.
Keep an eye on it as the edges start to bubble and turn brown.
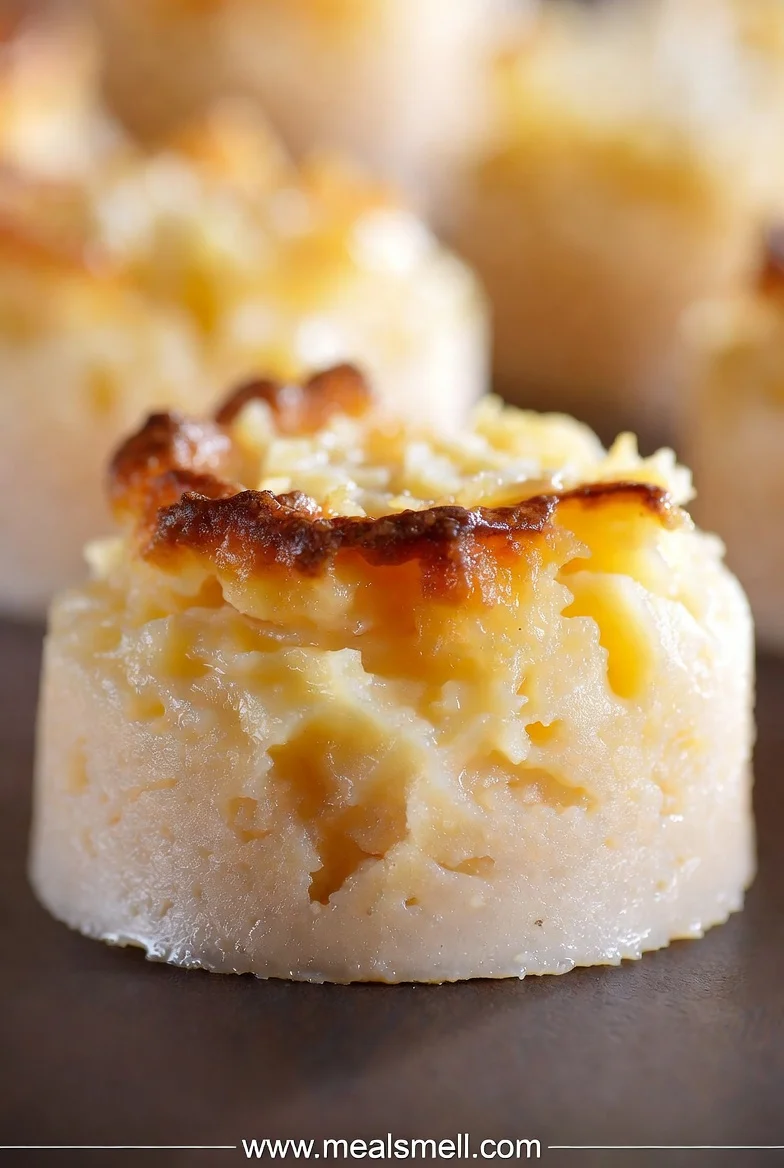
You are looking for a beautiful golden-brown finish across the entire top.
Test the center with a toothpick; it should come out clean and hot.
For a truly creamy topping, some cooks add extra milk in the final minutes.
However, letting the natural sugars caramelize on their own is just as delicious.
Cooling and Slicing
Patience is the hardest part of cooking, but it pays off here.
Let the cake rest in the pan for at least ten minutes first.
Move it to a wire rack to cool down completely before you cut.
Slicing it too early can make the squares look a bit messy.
Once cooled, cut them into generous squares and serve them to your hungry crew.
This treat tastes even better the next day if you can actually wait.
Tips for Success
I once rushed the thawing process and ended up with a soggy mess.
To avoid my mistakes and master this Cassava Cake, keep these handy tips in mind.
- Always squeeze excess moisture from thawed cassava to ensure a firm, chewy texture.
- Use full-fat coconut milk for the richest, most authentic flavor and creamy mouthfeel.
- Tap the baking dish on the counter to remove air bubbles before sliding it in.
- Let the cake cool completely so the starches set perfectly for clean, sharp slices.
Essential Kitchen Equipment
You don’t need a professional kitchen to pull off a stellar Cassava Cake.
I usually stick to the basics that any guy likely has in his cupboard.
- 9x13-inch Baking Dish: A glass pyrex or ceramic pan works best for even heat.
- Mixing Bowls: One large bowl for the batter and a smaller one for dry bits.
- Whisk: A sturdy wire whisk ensures your coconut milk and eggs are fully blended.
- Spatula: Essential for scraping every last drop of that creamy batter into the pan.
Variations of Cassava Cake
I’ve spent many weekends experimenting with this recipe like a mad scientist in an apron.
While the classic version is a knockout, sometimes you want to pivot and try something new.
The beauty of a Cassava Cake is how well it adapts to different flavor profiles.
Whether you want more decadence or a salty kick, these variations never fail to impress.
- The Custard Crown: Whisk an egg yolk with condensed milk and pour it on during the last 15 minutes.
- The Savory Twist: Sprinkle a generous layer of shredded sharp cheddar cheese on top for a salty-sweet combo.
- Macapuno Style: Fold in strings of preserved young coconut to add a juicy, authentic texture to every bite.
- Dairy-Free Swap: Use a vegan butter substitute and coconut condensed milk to keep it entirely plant-based.
- The Tropical Nut: Mix in crushed macadamia nuts or toasted cashews for a surprising, buttery crunch.
Serving Suggestions
There is something deeply satisfying about pairing a warm square of Cassava Cake with a drink.
I find that the rich, tropical sweetness reaches a new level when served with intention.
- Coffee Pairing: Serve with a dark roast or espresso to balance the creamy profile.
- Tea Time: A hot cup of jasmine or ginger tea cuts through the dense texture beautifully.
- Fruit Garnish: Add fresh mango slices on the side for a bright, acidic pop of flavor.
- Temperature Play: Try it chilled from the fridge for a fudgy, refreshing afternoon pick-me-way.
FAQs about Cassava Cake
I used to stare at the grocery freezer wondering if "fresh is always best."
Experience taught me that a Cassava Cake is surprisingly forgiving if you know the tricks.
These common questions will help you navigate the kitchen like a seasoned pro.
You’ll find that mastering this Filipino dessert is easier than you originally thought.
Can I use frozen cassava for this Cassava Cake?
You absolutely can, and honestly, it is a massive lifesaver for busy weeknights.
I almost exclusively use the frozen, grated variety found in Asian supermarkets.
Just ensure you thaw it completely in the fridge before you start mixing.
The most vital step is squeezing out every drop of excess moisture from the pulp.
If you skip the squeeze, your Easy Cassava Cake Recipe might turn out soggy.
Use a cheesecloth or a fine mesh strainer to get that perfect, chewy consistency.
Is Cassava Cake naturally gluten-free?
Yes, this is one of the best treats for friends with dietary restrictions.
The Cassava Cake relies entirely on the starchy root rather than wheat flour.
It provides that dense, satisfying bite without any of the gluten-related bloat.
Just double-check your baking powder label to ensure it is certified gluten-free.
This makes it a fantastic, safe option for office potlucks or family gatherings.
Everyone can enjoy a slice of this creamy cassava cake without any worry.
How do I store leftovers for the best taste?
If you actually have any left, storing them correctly keeps the texture on point.
I usually wrap the dish tightly in plastic wrap to keep the air out.
Pop it in the fridge, where it will stay fresh for about three days.
Cold Cassava Cake actually firms up and becomes delightfully fudgy and dense.
If you prefer it warm, a quick zap in the microwave restores that softness.
About 20 seconds is usually enough to make it taste oven-fresh again.
Final Thoughts
There is a certain quiet pride that comes from pulling a golden Cassava Cake out of your own oven.
It represents a perfect break from the high-speed demands of our professional lives.
Sharing a slice of this Filipino dessert connects you to a rich, vibrant culinary tradition.
You don’t need to be a master chef to deliver these deep, tropical flavors to your table.
This Easy Cassava Cake Recipe proves that simple ingredients can create something truly extraordinary and memorable.
I hope this creamy treat brings as much joy to your home as it does to mine.
Fire up the oven and reclaim your kitchen with a dessert that speaks for itself.
Your friends and family will certainly thank you for every single chewy, decadent bite.
Cassava Cake: The Best Easy and Creamy Recipe.
A classic Filipino dessert that is incredibly creamy, moist, and easy to make. This cassava cake features a rich blend of coconut milk and condensed milk with a golden-brown finish.
- Prep Time: 15 minutes
- Cook Time: 50 minutes
- Total Time: 1 hour 5 minutes
- Yield: 12 servings 1x
- Category: Dessert
- Method: Baking
- Cuisine: Filipino
- Diet: Gluten Free
Ingredients
- 2 cups grated cassava (fresh or frozen, thawed)
- 1 cup coconut milk
- 1 cup sweetened condensed milk
- ½ cup granulated sugar
- ¼ cup unsalted butter, melted
- 3 large eggs
- 1 teaspoon vanilla extract
- 1 teaspoon baking powder
- ¼ teaspoon salt
- ½ cup shredded coconut (optional, for topping)
Instructions
- Preheat your oven to 350°F (175°C). Grease a 9x13-inch baking dish or line it with parchment paper for easy removal.
- In a large mixing bowl, combine the grated cassava, coconut milk, sweetened condensed milk, melted butter, eggs, and vanilla extract. Whisk everything together until it’s well blended and smooth.
- In a separate bowl, mix together the baking powder and salt with the cassava mixture. Stir until just combined—don’t overdo it!
- Pour the batter into the prepared baking dish, spreading it out evenly. If using shredded coconut, sprinkle it generously on top.
- Bake in the preheated oven for about 45 to 55 minutes, or until the top is golden brown and a toothpick inserted in the center comes out clean.
- Once done, remove the cake from the oven and let it cool in the pan for about 10 minutes. Then, transfer it to a wire rack to cool completely.
- Slice and serve warm or at room temperature.
Notes
- If using frozen grated cassava, make sure to squeeze out excess moisture after thawing.
- For a more traditional topping, you can spread a mixture of condensed milk and egg yolk on top during the last 15 minutes of baking.
- Store leftovers in the refrigerator for up to 3 days.
Nutrition
- Serving Size: 1 slice
- Calories: 285 kcal
- Sugar: 24g
- Sodium: 115mg
- Fat: 14g
- Saturated Fat: 9g
- Unsaturated Fat: 4g
- Trans Fat: 0g
- Carbohydrates: 38g
- Fiber: 1.5g
- Protein: 4g
- Cholesterol: 65mg
Keywords: Cassava Cake, Filipino Dessert, Easy Cassava Cake Recipe, Creamy Cassava Cake, Gluten Free Cake