Introduction to Delicious Key Lime Pie Bars Recipe to Savor
Earlier today, my brother Mike and his family came over, excited and slightly out of breath from their bike ride. Just as they walked through the door, my niece Emma exclaimed, "Aunt Maria, can we have key lime pie?" This took me back to our years in Florida, where fresh key limes were abundant and made their way into many of our summer desserts. I remember one particularly sweltering afternoon at my old house in Miami when I made a big, classic key lime pie for a neighborhood cookout. Everyone gathered around, sharing stories, laughter, and platters piled high with their own signature dishes.
Key lime pie always reminds me of the warmth of summer and the way a simple dessert can bring people together. But today, with the urge to bake something a little more portable (and with a sprinkle of nostalgia), I decided to create these delightful key lime pie bars instead. They capture that same tangy flavor and luscious creaminess while being easy to cut into squares and serve. Plus, they’re a perfect treat to enjoy outdoors, on a warm afternoon, or at a family gathering.
With a buttery graham cracker crust underneath a zesty, velvety filling, each bite promises that perfect balance of sweet and tart. As the sun streamed through my kitchen window, I could already imagine the laughter and smiles of my family as they enjoy this refreshing treat. So, let’s dive into making these key lime pie bars and bring a piece of the sunshine to your kitchen!
Why You'll Love This Delicious Key Lime Pie Bars Recipe to Savor
These key lime pie bars are incredibly easy to make, allowing you to whip them up in no time. They require minimal ingredients and little fuss, making them a perfect dessert for busy weeknights or last-minute gatherings. You can prepare them in under an hour, allowing for plenty of time to chill before serving. Perfect for summer gatherings or after a weekend barbecue, these bars truly shine when enjoyed with family and friends, tickling the taste buds of both young and old alike.
The flavor is simply divine! The tartness of the key limes perfectly balances the creamy filling, making every bite refreshing and delightful. The sweetened condensed milk adds a silky richness that contrasts beautifully with the zesty key limes, while the graham cracker crust offers a satisfying crunch. Once you taste them, you’ll find it hard to resist going back for another square! Its uplifting flavors instantly transport you to a sunny beach, making it a favorite for summer parties.
They are incredibly versatile for any occasion. Whether it's a summer BBQ, a picnic in the park, or just a sweet treat to enjoy at home, these bars are sure to impress friends and family alike! Additionally, they can be made ahead of time, making them a fantastic option for potluck dinners or family gatherings, allowing you to enjoy the day rather than being stuck in the kitchen!
Ingredients Delicious Key Lime Pie Bars Recipe to Savor
I always like to use fresh key limes if I can find them, as their vibrant flavor changes the game for this dessert. The bright yellow filling, with its tart punch, seems to capture the very essence of summer sunshine. The graham cracker crust, made with just a few ingredients, provides a lovely crunchy texture that perfectly complements the creamy filling. It’s amazing how just a handful of ingredients come together to create something so delicious. Here’s what you’ll need:
- 1 ½ cups (150g) graham cracker crumbs
- ⅓ cup (65g) granulated sugar
- ½ cup (1 stick or 115g) unsalted butter, melted
- 2 large eggs, room temperature
- 1 can (14 oz or 396g) sweetened condensed milk
- ½ cup (120ml) fresh key lime juice
- Zest of 2 key limes
- 1 teaspoon vanilla extract
- Powdered sugar for dusting (optional)
- Whipped cream for serving (optional)
How to Make Delicious Key Lime Pie Bars Recipe to Savor
Prepare the Crust
Start by preheating your oven to 350°F (175°C). While the oven warms up, take a mixing bowl and combine the graham cracker crumbs with the granulated sugar. The sweetness of the sugar will enhance the molasses flavor in the crackers, creating a lovely contrast with the tart lime filling. Pour in the melted butter and mix until everything is well combined—when you squeeze it in your hand, it should hold its shape. Don't be timid; get those hands in there! You want a good mixture, and using your hands helps to blend the crumbs and butter perfectly.
Next, press this mixture firmly into the bottom of a greased 9x9-inch (23x23cm) baking pan. I usually like to use a flat-bottomed glass or measuring cup to compact it into an even layer. Be diligent here—this crust is your foundation! It should feel firm to the touch, and I like to aim for a crust that’s about a quarter-inch thick. When you pop this into the preheated oven, let it bake for about 10-12 minutes until it’s golden brown and fragrant, filling your kitchen with an inviting buttery aroma that will make your mouth water.
Make the Filling
While the crust is cooling slightly, let’s whip up that creamy filling. In another mixing bowl, whisk together the eggs until smooth. I love the way the eggs become a frothy mix, which helps lighten the overall filling. Slowly add in the sweetened condensed milk, which provides that rich creaminess you’ve been dreaming of. It'll thicken beautifully as you mix it all together. Follow this with the fresh key lime juice, lime zest, and vanilla extract. The wonderful fragrance of the lime zest will brighten up your kitchen, and you won’t just be cooking—you’ll be creating magic! It’s like summer captured in a bowl!
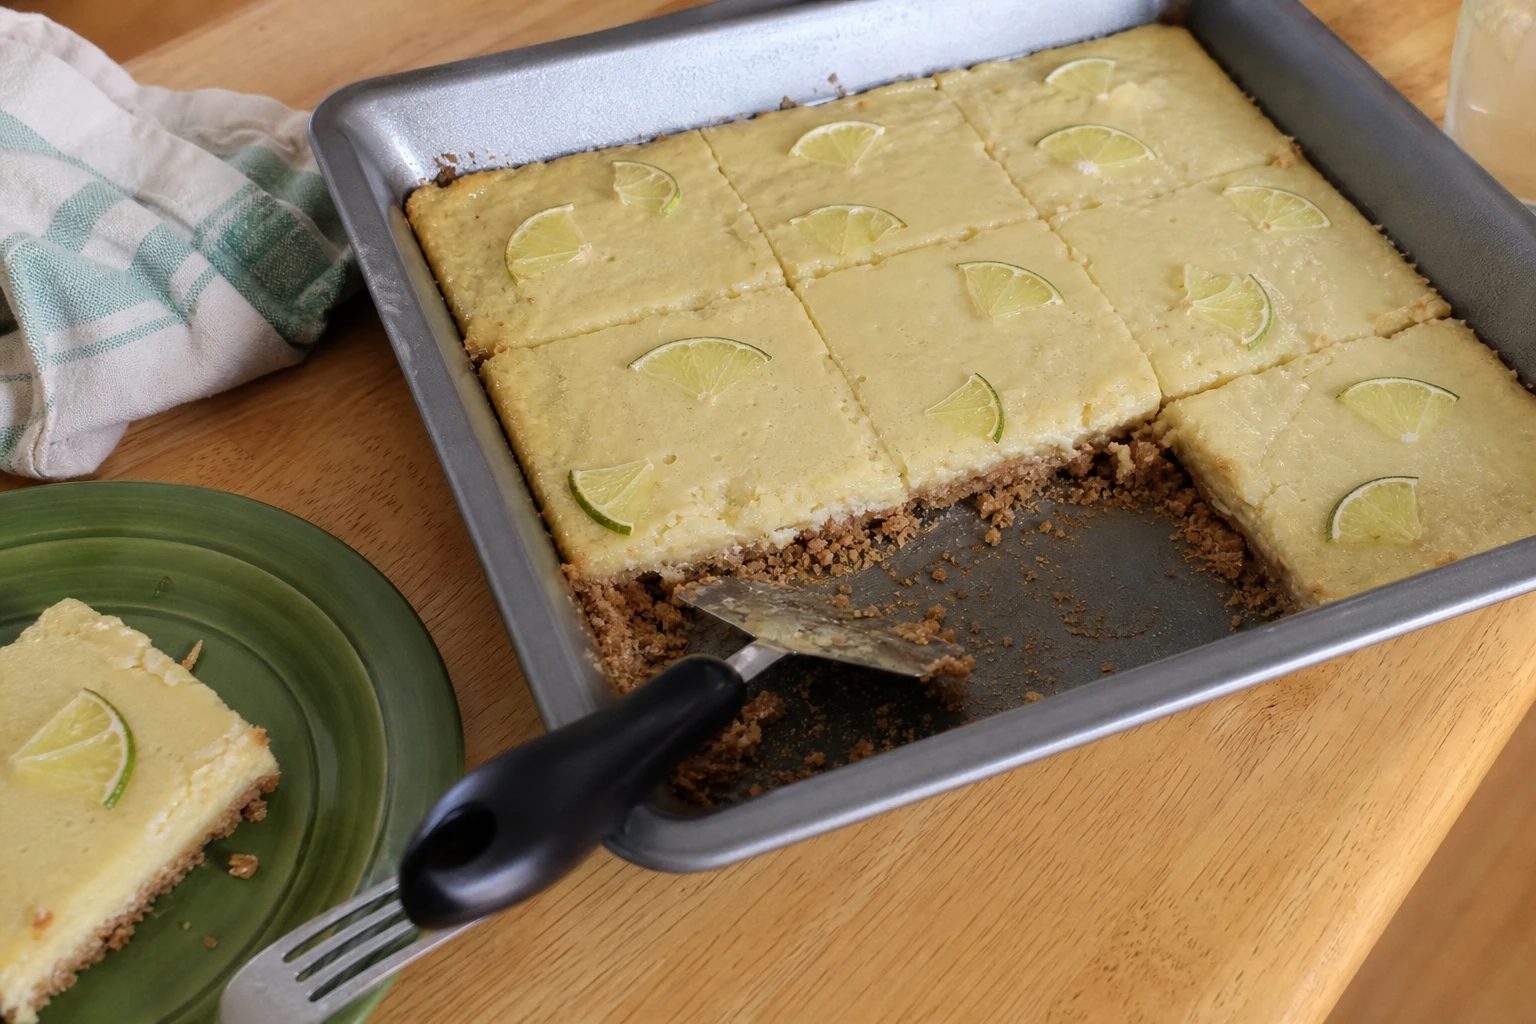
Once combined, pour this luscious filling over the pre-baked crust. It’s a beautiful sight as the vibrant yellow citrus color dances atop the golden-brown crust. Just a tiny swirl with a spatula will help distribute it evenly, ensuring that every bite is infused with that fantastic key lime flavor. The contrasting colors of the yellow filling against the light brown crust make for such a visually appealing dessert. Your kitchen will feel like a little slice of paradise as you prepare to bake it one last time.
Bake and Cool
Now, return the pan to the oven and bake for an additional 15-20 minutes until the filling is set but still slightly jiggly in the center. This is a delicate balance—if you overbake, you could end up with a rubbery texture, so you want to keep an eye on it! The edges should barely be puffed, and it should look just about set in the center. As you wait, the sweet aroma filling the room will be your guide, turning the anticipation of dessert into a full-fledged craving.
Once done, remove them from the oven and let them cool at room temperature for about 1 hour, before transferring them to the refrigerator. Chilling is crucial here; it allows the filling to set perfectly, creating those ghostly swirls of lime deliciousness you crave. I usually let them chill for at least 2 hours before cutting them into bars. This cooling time not only helps the texture but enhances the flavors as well, marrying them into a delightful harmony.
Serve and Enjoy
When you’re ready to serve, simply dust the bars with powdered sugar, adding a dash of elegance. You can also top each bar with a dollop of whipped cream for an extra touch that makes each slice feel indulgent. I find that a swirl of light whipped cream adds richness and balances out the citrusy zing. Trust me, each bite will taste like a piece of sunshine wrapped in a square! Remember, presentation matters; don’t skip out on that finishing touch!
As you cut into them, enjoy the way they slice cleanly, revealing the beautiful layers of crust and filling. The texture contrasts wonderfully—the crispness of the crust, the creaminess of the filling, and a slight tang that keeps you coming back for more. Invite your family or friends to help, and take a moment to soak in the joy of sharing delicious homemade treats together! Nothing compares to the joy on children’s faces when they taste this delightful treat, and you’ll find they don’t last long on the plate!
Tips for Success
- For a richer flavor, use freshly squeezed key lime juice instead of bottled. The flavor difference is noticeable! You can even experiment with zesting the limes before juicing to maximize fragrance.
- If you don’t have graham crackers, digestive biscuits work well too; just crush them the same way! You can switch it up with crushed vanilla wafers for a unique twist as well.
- Make sure to allow adequate cooling time. Skipping this may lead to a more runny filling, which can be a disappointment in terms of texture. Patience is key!
- To store, keep the leftover bars in an airtight container in the fridge for up to five days. They’re delightful chilled, but bring them to room temperature for the best texture before serving.
- If you want to spice things up, consider adding a touch of lime zest into the whipped cream topping—it's a lovely flavor enhancer! Grate some zest directly into your whipped cream for an aromatic experience.
- Common mistakes include overbaking; the center should remain a bit jiggly but look set around the edges! An overbaked pie can lose its creamy texture, leaving you with a dense filling instead.
- If you want to take it a step further, garnish with fresh berries, or even a sprig of mint for color and extra freshness when serving.
Equipment Needed
- 9x9-inch (23x23cm) baking pan
- Mixing bowls
- Whisk
- Measuring cups and spoons
- Spatula
- Cooling rack
Variations of the Delicious Key Lime Pie Bars Recipe to Savor
- For a gluten-free version, use gluten-free graham crackers. It's easily adaptable without sacrificing taste for dietary restrictions!
- Try adding a layer of coconut flakes to the crust for a delicious twist. Toast them slightly for an extra depth of flavor that enhances the tropical vibe.
- Swap out the key limes for regular limes if that’s what you have on hand. Keep the measurements the same, and you’ll still achieve a refreshing dessert!
- For a chocolate version, melt some dark chocolate and mix it into the filling for a decadent treat. You could also drizzle chocolate on top of the bars for a delightful contrast.
- Add fresh berries on top for a pop of color and extra flavor! Strawberries, raspberries, or blueberries would make for a lovely presentation.
- Top with toasted coconut for added texture and taste. It complements the lime beautifully and elevates the dessert.
Serving Suggestions
- Pair with fresh fruit like berries or mango for a fruity contrast. The sweet and tart balance will make every bite even more succulent!
- Serve alongside a scoop of vanilla ice cream for an indulgent dessert. The coolness of the ice cream pairs well with the zesty filling.
- Top with a sprig of mint for a splash of color and freshness—adding a serene touch of greenery to your serving plate.
- These bars are perfect for summer picnics and backyard BBQs; they’re easy to transport and will brighten anyone's day!
- Enjoy them with a cup of chilled lemonade or iced tea for a refreshing treat after a long day in the sun; it’s like a summer vacation on a plate!
Nutrition
Serving size: 1 bar | Calories: 210 | Protein: 3g | Carbs: 30g | Fat: 9g
FAQs about Delicious Key Lime Pie Bars Recipe to Savor
Can I use regular limes instead of key limes?
Absolutely! While the flavor will be slightly different, regular limes can still produce delicious bars. Just ensure that you use the same measurement of lime juice as the recipe calls for. Regular limes might lend a slightly less sweet flavor characteristic, so be prepared for a little adjustment in taste. The end result will still be tangy and delightful!
How long do these key lime pie bars last?
When stored in an airtight container in the refrigerator, these bars can last for up to five days. They may lose some freshness after that, so I recommend enjoying them sooner rather than later! Additionally, the flavors seem to meld together after a day in the fridge, making them even more delicious and zesty, so they truly are best enjoyed within the first couple of days.
Can I freeze key lime pie bars?
Yes, you can freeze them! Cut the bars and wrap them tightly in plastic wrap, then place them in an airtight container. They can be frozen for up to 3 months; just thaw them in the fridge before serving. Make sure they are well-wrapped to avoid freezer burn which can affect their taste and texture upon thawing.
What should I serve with key lime pie bars?
These sweet-tart bars pair beautifully with whipped cream, fresh fruit, or a scoop of vanilla ice cream. You can also serve them with a light tea or lemonade for a refreshing treat! Their vibrant acidity complements various flavors well, enhancing your picnic's dessert table beautifully, and delighting guests with contrasting textures and taste.
Why did my key lime bars turn out runny?
If the filling was too jiggly, it likely needed more baking time. Make sure you bake them until the edges are set and the center is still slightly wobbly, as it will firm up during cooling. This delicate nature of the custard ensures a perfectly creamy texture, but keep in mind that opening the oven door too often can drop the temperature and affect doneness as well!
Can I adjust the sweetness of the bars?
Definitely! If you prefer a less sweet bar, you can reduce the amount of sweetened condensed milk or add less sugar to the crust. Just keep in mind that the flavor profile will change slightly. Tasting your mixture before pouring it on the crust can also help you determine if more or less sweetness is required!
Final Thoughts
I truly hope you enjoy making these key lime pie bars as much as I do! They’re a testament to how a simple dessert can bring happiness and comfort to our lives, bridging memories of past summers while creating new ones in the present. The lovely tang and sweet indulgence of these bars are sure to bring smiles and share happiness among family and friends. Don’t hesitate to share your creations with loved ones—after all, the best memories are made around the table! Happy baking!
Recipe card
Delicious Key Lime Pie Bars Recipe to Savor
Try this easy key lime pie bars recipe for a refreshing twist on a classic dessert....
✿
Prep
15 min
Cook
35 min
Total
50 min
Serves
16
Calories
210
Protein
3g
Carbs
30g
Fat
9g
Calories are per serving and stay the same when you scale servings above -- only ingredient amounts adjust.
Ingredients
Instructions
✿
www.mealsmell.com