
Introduction
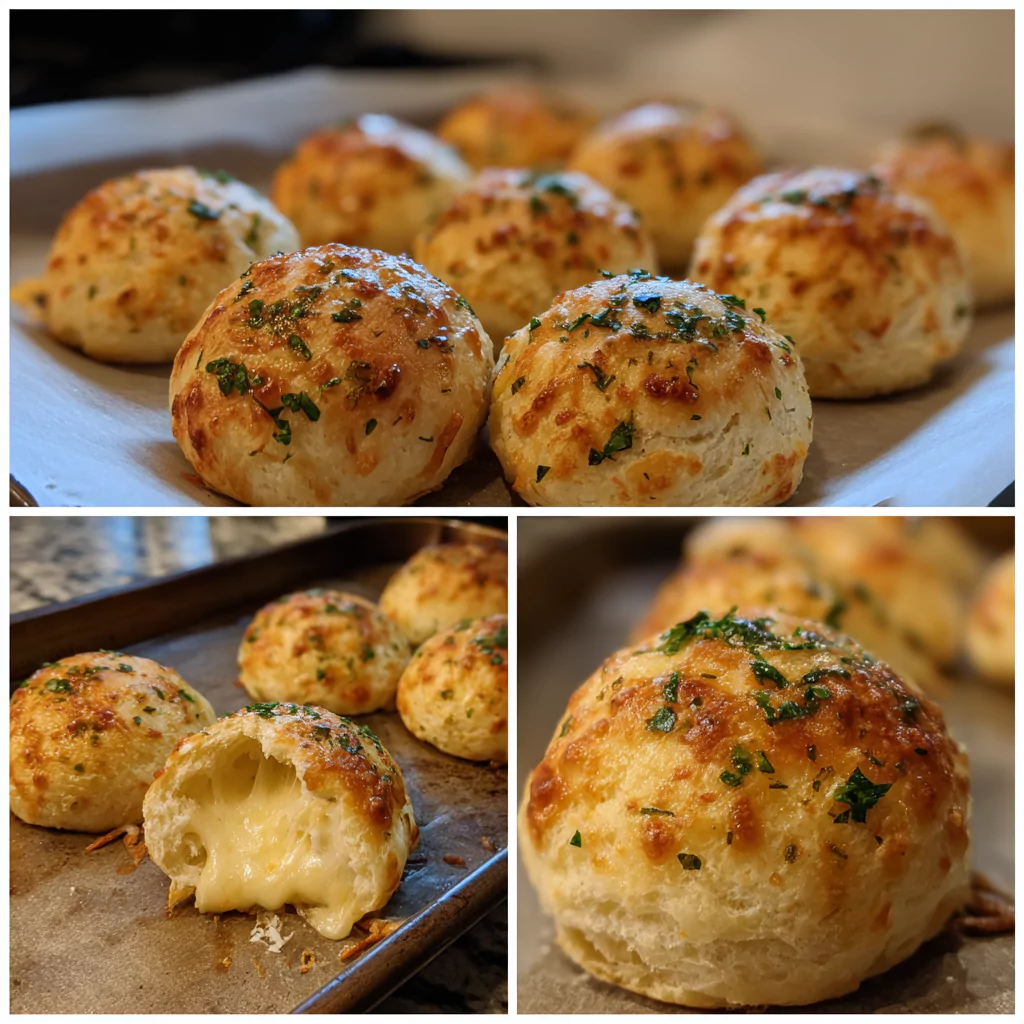
If you’re looking for an easy, delicious, and crowd-pleasing snack, Cheesy Garlic Biscuit Bombs are the answer. Warm, buttery biscuit dough is wrapped around melty mozzarella cheese, brushed with savory garlic butter, and baked to golden perfection. The result? A bite-sized explosion of flavor that’s perfect for game nights, family dinners, or even as a quick side to a hearty soup. These little bombs are as addictive as they are easy to make, and trust us—you won’t be able to stop at just one.
Pro Tip
Don’t skip the parchment paper! It ensures that your biscuit bombs come off the baking sheet easily without sticking. It also helps keep the bottoms from getting too dark while they bake.
Serving Suggestions
- As an appetizer for dinner – Serve these cheesy bombs with a fresh salad or a hearty bowl of soup.
- Perfect with marinara – A small dish of marinara or ranch dressing for dipping will take these biscuit bombs to the next level.
- Game day treat – Set them out at your next sports gathering for a crowd-pleasing, finger-food-friendly snack.
Variations
- Spicy Kick: Add a pinch of red pepper flakes to the garlic butter mixture for a subtle heat.
- Herb Infused: Swap out the Italian seasoning for fresh herbs like basil or thyme to give the biscuits a garden-fresh twist.
- Cheese Lovers: Mix shredded cheddar or parmesan with the mozzarella for a richer, cheesier bite.
- Gluten-Free: Use a gluten-free biscuit dough and check that your cheese is gluten-free to make these bombs suitable for gluten-sensitive diets.
Equipment Needed
- Baking Sheet: To spread out the biscuit bombs and ensure they bake evenly.
- Parchment Paper: For easy cleanup and to prevent sticking.
- Small Bowl: To mix the garlic butter seasoning.
- Pastry Brush: To evenly coat the biscuit bombs with the garlic butter mixture.
Tips for Success
- Seal the dough well around the cheese. Pinch the edges tightly so the cheese doesn’t escape while baking.
- Don’t overbake. Keep an eye on them after 12 minutes—once the tops are golden brown, they’re ready to come out.
- Use fresh mozzarella if you can. It melts beautifully and gives the bombs a stretchy, gooey texture.
- Let them cool for a minute after baking. The cheese will be extremely hot right out of the oven, so give it a moment to set before biting in.
- Brush with extra garlic butter. For that extra garlicky goodness, feel free to brush the tops of the biscuit bombs again right before serving.
Why You’ll Love This Recipe
These cheesy garlic biscuit bombs are a perfect blend of simple ingredients, big flavors, and comfort food magic. They’re easy to make, and the bite-sized pieces make them great for serving at parties, potlucks, or even just a cozy movie night. Plus, they’re so versatile—you can customize them with different cheeses, seasonings, or even spices to suit your taste. They’ll quickly become a go-to in your recipe box!
Recipe Card
Ingredients
- 1 (16oz) container refrigerated biscuit dough (8 biscuits)
- 4 oz mozzarella cheese (soft, shredded or diced string cheese)
- 4 tablespoon melted butter (half a stick)
- 1 teaspoon garlic powder
- 1 teaspoon Italian seasoning
- Pinch of salt
Directions
- Preheat the oven to 375°F (190°C). Line a baking sheet with parchment paper or lightly grease it.
- Open the container of refrigerated biscuit dough and separate the biscuits. Flatten each biscuit into a 3-inch circle.
- Place a piece of mozzarella cheese in the center of each biscuit dough circle.
- Fold the edges of the dough up and around the cheese, pinching to seal and form a ball.
- Place the cheese-filled biscuit bombs seam-side down on the prepared baking sheet.
- In a small bowl, combine the melted butter, garlic powder, Italian seasoning, and a pinch of salt.
- Brush the tops of the biscuit bombs with the seasoned butter mixture.
- Bake for 12-15 minutes, or until the biscuit bombs are golden brown and the cheese is melted and gooey.
Nutrition Table (Estimated per serving – based on 8 servings)
- Calories: 190
- Protein: 7g
- Carbohydrates: 16g
- Fat: 12g
- Fiber: 1g
- Sugar: 1g
- Sodium: 350mg
FAQ
1. Can I make these ahead of time?
You can prepare the biscuit bombs and refrigerate them for up to a day before baking. Simply cover them tightly with plastic wrap and bake as directed when you’re ready to enjoy them.
2. Can I freeze these?
Yes! After forming the biscuit bombs, freeze them on a baking sheet until solid, then transfer them to a freezer-safe bag. Bake from frozen for an extra 3-5 minutes at 375°F.
3. Can I use a different kind of cheese?
Absolutely! You can swap the mozzarella for cheddar, provolone, or even a blend of your favorites for a fun twist.
4. How do I store leftovers?
Store leftover biscuit bombs in an airtight container in the refrigerator for up to 3 days. Reheat in the oven or microwave for a few seconds before serving.
5. How can I make these even more garlicky?
You can add minced fresh garlic to the butter mixture or sprinkle a little garlic salt on top of the biscuit bombs before baking for an extra punch of garlic flavor.
Cheesy Garlic Biscuit Bombs: The Ultimate Comfort Snack
Ingredients
Equipment
Method
- Preheat your oven to 375 degrees Fahrenheit and line a baking sheet with parchment paper.
- Open the can of biscuit dough and separate each individual biscuit.
- Use your fingers to flatten each biscuit into a small circle about 3 inches wide.
- Place one cube of mozzarella cheese in the center of each dough circle.
- Carefully wrap the dough around the cheese and pinch the edges firmly to seal the ball.
- Place the cheese-stuffed dough balls seam-side down on the prepared baking sheet.
- In a small bowl combine the melted butter minced garlic dried parsley and salt.
- Use a pastry brush to coat the top of each biscuit bomb with half of the garlic butter mixture.
- Sprinkle the grated Parmesan cheese evenly over the tops of the buttered biscuits.
- Bake for 12 to 15 minutes or until the biscuits are puffed and golden brown.
- Remove from the oven and immediately brush the remaining garlic butter over the hot biscuits.
- Serve warm while the cheese inside is still melted and stretchy.